facebook twitter instagram youtube linkedin bloglovin
  • Home
  • About
    • About Me
    • My Travel Destinations
    • My Bucket List
  • Travel
    • Hong Kong
    • Japan
    • Macao
    • Malaysia
    • Philippines
    • Singapore
    • South Korea
    • Taiwan
    • Thailand
    • USA
  • Food
  • Reviews
    • Airline
    • Cruise
    • Ferry
    • Hiking
    • Hotel
    • Jewelry
    • Product
    • Restaurant
    • Shopping
    • Ski
    • Visa Tips

I am Ulyssa Elaine - Travel, Food and Lifestyle Blogger


There are several ways to go from Incheon International Airport to downtown Seoul.
Disclaimer: Since we were just only 2 girls and we were first time in Seoul, we took Airport Limousine Bus for hassle-free travel. We didn’t find any problems when we took a ride with it. Good thing, our hotel is near in Airport Limousine bus stop at Myeong-dong Area. :)


» Airport Railroad Express (AREX) «

Image courtesy: Airport Railroad Co. Ltd,. http://www.arex.or.kr

AREX operates two trains: the Express Train from Internation Airport to Seoul Station and the All Stop Train that services 11 subway stations.

Express Train will take about 43 minutes going to Seoul Station, with a rate of 14,800 won. An All Stop Train will take about 56 minutes, with a rate of 4,250 won for adults, 3,040 won for the youth and 1,900 for children.


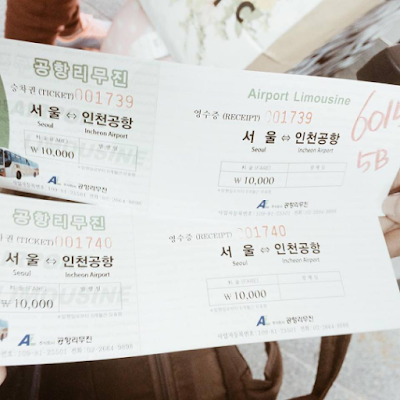
» Airport Limousine Bus «


Image courtesy: Incheon International Airport www.arex.or.kr

Airport Bus is located next to Gates 4 and 9 inside the arrival floor (1F) and outside next to Gates 4,6,7,8,11,13 and 9C.

There are two types of airport buses: Deluxe Limousine Bus and Standard Limousine Bus. The first one operates non-stop or shortened routes to major destinations and have comfortable seats with more space. The rate to downtown Seoul is 14,000 - 16,000 won. The other one is more crowded with smaller space and more stops. The rate is 9,000 - 10,000 won.

On our way to Myeong-dong, we rode on Standard Limousine Bus since we are not in a hurry. Going back to Incheon International Airport, we rode a Deluxe Limousine Bus since we we didn’t want to be late on our departure.


» Taxis « 


If you find the two above hassle, just take a taxi. Exit the airport through Gates 4 and 8 only of the passenger terminal (arrival area), cross the street and go to the taxi stands (4D-8C). Caution: It is really expensive depending on your destination. :)


How about you? Have you travelled to South Korea? What mode of transportation did you take when you travelled from airport to your hotel? Share your experience.
Saturday, April 30, 2016 No comments

I am one of many people who don’t want to indulge on credit card. My Mom always reminds me that never, ever get a credit card. I’m also scared being in a position with many debts. That’s why when I heard that BPI launched BPI My ePrepaid Card and I’m also going to South Korea, I decided to get my own BPI ePrepaid Card.

I know it’s hassle to go to the bank and load this card but I need to do this in sake of not getting in to many debts. Hehe. 

Going back to the topic, here’s the process of how I booked a hotel online.
P.S. I booked my hotel in Seoul through Agoda. :)

» Step 1: Search for hotel «

Type your destination as well as indicate the date and how many guests will stay at the hotel.


» Step 2: Accessibility «

Search for a nice hotels that near in subways, bus stations as well as shopping area.


Take note: it’s good that you check also the rating of the hotel and the reviews. This is also for your safety. Ratings with 8 and above is good already. :)

I chose at Myeong-dong area because I want to stay near in shopping areas. :)

» Step 3: Budget, Free Cancellation and Perks «


Find a hotel with your budget range. Better to have a hotel that offers a free cancellation or pay later option.


I always book with Pay Later option and also Free Cancellation. I booked our hotel in Seoul with Pay Later option because I have time to save money. Hehe. 

For me, hotels within Php 5,000 / around $100 range is good already since South Korea is a First World Country and everything seems to be expensive.

» Step 4: Double-check «

Check the price first before paying. Do you think Php 35,000+ is enough for 7 days travel? If you are already sure, sign up or login to your Agoda account.


» Step 5: Pay Now or Pay Later? «


Choose from the two. If you are already have a fund, then go for pay now option. Don’t worry because you booked the hotel with FREE CANCELATION. So anytime you can cancel your hotel booking. Otherwise, go on to Pay Later if you don’t have funds yet.

Since I just have a Prepaid Card, put your Prepaid Card details.

This is just a sample only.

Then hit the BOOK & PAY LATER button! Hooray! You made a transaction! Make sure to pay your hotel before the indicated date. Check also your email for the payment details that Agoda will send to you.

Disclaimer: This is not a sponsored post. I just shared my experience. :)


How about you? How and where do you book your accommodation when travelling abroad. Share your experience.
Saturday, April 30, 2016 No comments
Last year (2015), I booked myself and my sister to South Korea to fulfill our long-time wish to visit the "Land of Morning Calm". We chose AirAsia instead of other airlines because other famous bloggers like Camille Co, Laureen Uy, Kryz Uy, etc. had a great experience with them. 


» How Did I Book? «

Booking with them was very easy. I booked online using my BDO debit card and after a couple of minutes, I received my itinerary on my e-mail.

You can also use their AirAsia mobile phone app to book a flight but I think credit cards are only accepted on the mobile app. I haven't check it though.

» Our Booking Details «

Our flight from Manila to Seoul was morning of March 1, 2016 ( 7:16 AM - 11:55 AM). Our flight back to Manila was afternoon of March 7, 2016 (12:51 PM - 3:58 PM).


» Check-in «

Checking-in was a breeze because you can use online or their mobile app to avoid long-queue at check in counter. For us, we chose to check-in using check-in counter but we didn't wait too long.


» Inside the Aircraft «

I was surprised about the size and cleanliness inside the aircraft. My sister and I was able to sleep well during our flight.


» Window Seat Perks «

We chose to seat near the Emergency Exit, which is located at the centre of the airplane. We didn't feel any dizziness during our flight. 


» Food and Services «

Because our flight going back to Manila was lunch time, we bought in-flight meals for our 4-hour flight.

My sister bought Bangus Sisig with Rice and a cup of hot chocolate. I bought Uncle Chin's Chicken Rice.


» Will We Book Again? «

Definitely, yes! AirAsia is the best budget airline that we've been to. 


How about you? Have you travelled via AirAsia? Share your experience.
Saturday, March 12, 2016 No comments


Almost all Filipinos dream to visit South Korea because of the vast spread of Korean dramas and Kpop groups. My sister and I wanted to go there, too. Way back in high school years, I promised to her that we will go there soon. It is really unexpected trip for the two of us. Thanks for our supportive parents that our trip will push through. We are going to South Korea in the next 3 days. We’re so excited!!!


I want to share to you how we got our first South Korean tourist visa. Actually, we took 2 weeks in preparing all necessary documents. We applied last February 2, and we got our visa last February 11. How fast right? We finally have our single-entry pass valid for 3 months.


» Step 1: Prepare the Necessary Documents «


A. Here are my requirements (employee):


1. Application Form

2. 1 piece Passport size picture

3. Original Passport (should be valid for more than 6 months)

4. Photocopy of Passport Bio-page (page 2)

5. Original Certificate of Employment


Ask you HR department to include the following infos: 
- position
- date hired
- compensation
- office address
- HR landline number (cellphone number is not allowed)
- HR email address.

6. Original Personal Bank Certificate

-account type

-current balance

-account opening date

-ADB

7. Bank Statement

-original or certified true copy of bank statement for the last 3 months

8. Form 2316 copy with personal TIN number


9. Photocopy of NSO Birth Certificate


B. Here are my sister’s requirements (student):


1. Application Form

2. 1 piece Passport size colored picture

3. Original Passport (should be valid for more than 6 months)

4. Photocopy of Passport Bio-page (page 2)

5. Original School Certificate

6. Photocopy of School ID

7. Photocopy of NSO Birth Certificate

8. My documents (it can be the parent’s financial support documents)

a. Employment certificate

b. Bank Certificate

c. Bank Statement

d. Form 2316 with personal TIN Number


» Step 2: Submit your application at the South Korean Embassy «

We submitted the above requirements at South Korean Embassy (122 Upper McKinley Road McKinley Town Center, Fort Bonifacio Taguig City, 1634, Philippines). No need for an online appointment. The applications are accepted from Monday to Friday 8:30 am to 12:00 pm. Visa for less than 59 days are FREE of charge! 😀 If you plan on staying of South Korea for more than 59 days to 90 days, the fee is Php 1,800.

First-time travelers will be asked to proceed on either Window 1 or Window 2. Frequent travelers or travelers with valid OECD-member visas will be redirected to Window 3.

The entire process won’t take more than an hour. I think we just spent less than 30 minutes inside the embassy. They will provide you a small piece of paper indicating when will you get your visa. Hopefully, with visa stamped on it. ðŸ˜€


» Step 3: Pray and Wait for your Visa to get Approved «

The processing time for first-time travelers will take about 5 business days. While frequest travelers and travelers with valid OECD-member visas will only take about 3 days.

Releasing time is only Monday to Friday 2:00 pm to 4:00 pm. Don’t forget to put your name and contact number at the back of the claiming slip.

Pray. Pray. Pray. As long as your requirements are complete, you don’t need to worry that much. Have a safe travel to us! 😀


How about you? Have you travelled to South Korea? Share your applying a visa experience.

Saturday, February 27, 2016 No comments
Venice Grand Canal Mall is a lifestyle mall developed by Megaworld Corporation. It is located in the heart of Mckinley Hill, The Fort, Taguig City. There were few restaurants and shopping stores that will be opened on the site. It was famous because the mall looks like the grand canal of Venetian, Macau. 


My sister and I visited the place last morning after we went to South Korean embassy, which is also located in McKinley Hill. :)


How about you? Have you been to this place? Share your experience.
Thursday, February 04, 2016 No comments
The Boiling Seafood Restaurant was one of the best paluto restaurant in Alabang area. It offers mouthwatering seafood dishes. Aside from seafood, they also serves pasta, soup, salad, chicken and baby-back ribs.


The best thing about this place is this 3 steps: pick your own seafood, pick the sauce and then choose the hot ratio of your seafood (tame, mild or wild).


How about you? Have you been to this place? Share your experience.

Friday, January 29, 2016 No comments
This year is my year. Yes, I was born in the Year of the Monkey (1992). I’m a 90′s girl. I started this year with bonding with my high school best friends. We met last January 2. 


Do you know that the 3 of us were all August babies? Yes, sounds weird. But the 2 of them were born in the year 1991. I’m the youngest one :). So back to the topic, we had a little conversation on Facebook Messenger that we want to meet after a couple of years. So here I am, I volunteered to tour them and I was their pretty driver at that day. We really didn't have an itinerary. But since I’m currently working in Alabang, I suggested that we’ll just go there. So here you go, we went to Alabang Town Center. 

We arrived just a few minutes after the opening of the mall. We took so many pictures at the parking lot and inside the mall. After a long walk, we decided to take a lunch at Amici Restaurant. I didn't want to eat too much rice after a long Christmas vacation so we just ate pizza, sweets and a pitcher of blue lemonade.


I recommend this place as one of the best hangout place with friends.


We had a chitchat about anything under the sun. Time flies so fast! We’re already in our middle 20s but our friendship will never lasts. Love you besties! See you again this summer...

Note: This is not a sponsored post.


How about you? Where do you bond with your friends? Share your thoughts.

Monday, January 04, 2016 No comments

Last November 15, my sister, my cousins and I climbed the famous Mt. Pico de Loro. Most of us are girls so we hired a local tour guide to accompany us on climbing up the famous mountain. 


Mt. Pico de Loro, also known as Parrot’s Peak is a popular destination for beginner mountaineers.  The tour begins with a forested, rocky roads. I can’t imagine how brave we were when we conquered this exciting hiking adventure. I know it won’t be the last.

» Our Itinerary «


7:00 am - 8:00 am :  Silang to Nasugbu Town Proper

8:00 am - 9:00 am : Nasugbu Town Proper to the Nasugbu-Ternate highway


9:00 am : We started to trek up to the mountain.


12:00 pm : We reached the summit and had a lunch there + photo ops.


1:00 pm : We started to descend.


4:00 pm : We reached the Nasugbu-Ternate highway and rode a tricycle back to town proper.


5:00 pm : We reached the Nasugbu town proper and had a dinner at nearby McDonalds.


7:00 pm : We headed back to Cavite. :)


With our tour guide… Thanks Kuya for helping us! See you next time.

» Tips «


1. Don’t forget to bring small towel, 1-2 litres of bottled water, a pack of lunch, first aid kit, flash light and gloves. Don’t forget to apply sunblock, too.


2. Do a lot of stretching exercises before you hike. (We failed this one and the result was we had 3-4 days body aches after the hike.)


3. Be optimistic and smile often while you are hiking. It will ease your body pain and you won’t notice you are walking and climbing for more than an hour.


4. Don’t forget to bring monopod, camera, phones. The sceneries above the summit is so beautiful!


5. Never skip the chance to climb up the monolith. (We missed this chance because we’re a bit scared when we saw how crooked and steep the road going there. :)


» Our Expenses «


Php 90 / head : Silang, Cavite to Nasugbu, Batangas

Php 100 / head | Php 400 (4 persons) : Nasugbu town proper to Nasugbu-Ternate highway


Php 200 / head | Php 800 (4 persons) : Tour Guide


Php 150 / head / Php 600 (4 persons) : Nasugbu-Ternate highway to Nasugbu town proper


Php 90 / head : Nasugbu town proper to Silang, Cavite


= Php 630 / head (Except for personal expenses like food and etc)


How about you? Have you visited this place? Share your experience.
Thursday, December 24, 2015 No comments
Movie Stars Cafe is a movie-themed restaurant located in SM Mall of Asia Seaside Blvd. Every night, Superheroes and Villains perform on stage bringing good-vibes ambiance to the restaurant.


The best time to go here is dinner time because of the cool performances of the cosplayers wearing superheroes costumes. 


They also serve buffets but we chose ala carte menus instead. 


The place is a good option to hang-out with your friends and family. For sure, they will enjoy it!


How about you? Have you been to this place? Share your experience.
Monday, November 30, 2015 No comments
Taal Volcano is a complex volcano located in the island of Luzon, Philippines. It is the 2nd most active volcano in the Philippines. Viewed from Tagaytay Ridge, Taal Volcano and its lake presents one of the most picturesque and attractive views in the Philippines.


You can actually reach the volcano crater by riding the horse.

» How to get there? «

Via Tagaytay City - There are two routes in Tagaytay City to go down on the town of Talisay, Batangas.


» Tips «

  • Eat heavy meal before you hike.
  • Don’t forget to bring lot of drinks!
  • Bring extra clothes and towels.
  • Wear comfortable clothes and shoes.
  • Wear a face mask to protect you from volcanic ashes and sulfur.
  • Apply sunblock on your skin.
  • Bring extra money. There are many souvenir shops at the top of the crater. 
  • Don’t forget to bring a camera!

» Expenses «

  • Boat rental - Php 1,500 / boat (good for 6 persons)
  • Environmental / tourist fee: Php 50.00 / pax
  • Landing Fee: Php 20.00/ boat
  • Horse Ride: Php 500.00 / pax
  • Red Lava Tour: Php 50.00 / pax (Recommended to go)
Total: Php 870 per person if group of 6 people


Rating: 4/5

Update as of January 14, 2020: Taal Volcano just erupted and it's now Alert Level #4. It's not safe to go here at the moment.

How about you? Have you visited this place? Share your experience.


Friday, September 18, 2015 No comments
Newer Posts
Older Posts

About me

I'm Ulyssa Elaine, a skinny girl from the Pearl of the Orient Seas, Philippines.

Featured Posts


Subscribe via Bloglovin'

Follow

Popular Posts

  • Sunnies Specs Review: Reagan in Rose Gold
    Sunnies Specs Review: Reagan in Rose Gold
  • Zalora PH: An Online Purchase Review
    Zalora PH: An Online Purchase Review
  • 14 Restaurants I Dined at Molito Alabang
    14 Restaurants I Dined at Molito Alabang
  • Ramen Nagi Alabang Branch Review
    Ramen Nagi Alabang Branch Review
  • My Skin 101 Diamond Peel Experience
    My Skin 101 Diamond Peel Experience

Blog Archive

  • ▼  2024 (1)
    • ▼  July (1)
      • Hotel Review: Best Western Hotel Fino Osaka Shinsa...
  • ►  2023 (2)
    • ►  April (1)
    • ►  February (1)
  • ►  2022 (12)
    • ►  December (1)
    • ►  November (3)
    • ►  September (1)
    • ►  June (1)
    • ►  May (3)
    • ►  April (2)
    • ►  February (1)
  • ►  2021 (1)
    • ►  November (1)
  • ►  2020 (22)
    • ►  May (9)
    • ►  April (7)
    • ►  March (4)
    • ►  January (2)
  • ►  2019 (12)
    • ►  December (1)
    • ►  September (1)
    • ►  June (3)
    • ►  May (1)
    • ►  February (4)
    • ►  January (2)
  • ►  2018 (31)
    • ►  December (4)
    • ►  November (2)
    • ►  September (3)
    • ►  August (1)
    • ►  June (1)
    • ►  April (10)
    • ►  March (5)
    • ►  February (5)
  • ►  2017 (31)
    • ►  December (2)
    • ►  November (4)
    • ►  October (3)
    • ►  September (2)
    • ►  August (6)
    • ►  July (1)
    • ►  April (1)
    • ►  February (9)
    • ►  January (3)
  • ►  2016 (33)
    • ►  November (2)
    • ►  October (1)
    • ►  September (1)
    • ►  July (14)
    • ►  June (7)
    • ►  May (1)
    • ►  April (2)
    • ►  March (1)
    • ►  February (2)
    • ►  January (2)
  • ►  2015 (9)
    • ►  December (1)
    • ►  November (1)
    • ►  September (3)
    • ►  May (1)
    • ►  April (1)
    • ►  January (2)
  • ►  2014 (4)
    • ►  December (1)
    • ►  April (1)
    • ►  March (2)
  • ►  2013 (2)
    • ►  December (2)

Blog Stats

Free counters!

Created with by ThemeXpose | Distributed By Gooyaabi Templates